安装部署(单机) 如果在测试开发环境,想要测试和使用etcd服务,只需要部署一个单点的 etcd 服务即可。
二进制文件部署 下载安装软件
1
2
3
4
5
6
7
8
9
10
11
12
13
14
15
16
17
18
19
20
21
22
23
24
25
26
27
# 下载软件包 [root@linux9 ~]# wget https://github.com/etcd-io/etcd/releases/download/v3.4.23/etcd-v3.4.23-linux-amd64.tar.gz [root@linux9 ~]# ls etcd-v3.4.23-linux-amd64.tar.gz # 解压到指定目录 [root@linux9 ~]# tar -zxf etcd-v3.4.23-linux-amd64.tar.gz -C /usr/local [root@linux9 ~]# cd /usr/local/etc etc/ etcd-v3.4.23-linux-amd64/ [root@linux9 ~]# cd /usr/local/etcd-v3.4.23-linux-amd64/ [root@linux9 etcd-v3.4.23-linux-amd64]# ls Documentation README-etcdctl.md README.md READMEv2-etcdctl.md etcd etcdctl # 添加环境变量 [root@linux9 etcd-v3.4.23-linux-amd64]# vim /etc/profile export PATH="$PATH:/usr/local/etcd-v3.4.23-linux-amd64" [root@linux9 etcd-v3.4.23-linux-amd64]# source /etc/profile # 验证 [root@linux9 etcd-v3.4.23-linux-amd64]# etcdctl version etcdctl version: 3.4.23 API version: 3.4 [root@linux9 etcd-v3.4.23-linux-amd64]# etcd --version etcd Version: 3.4.23 Git SHA: c8b7831 Go Version: go1.17.13 Go OS/Arch: linux/amd64
1
2
3
4
5
6
7
8
9
10
11
12
13
14
15
16
17
18
19
20
21
22
23
24
25
26
27
28
29
30
31
32
33
34
35
# 创建数据目录与配置文件目录 [root@linux9 ~]# mkdir -p /etc/etcd [root@linux9 ~]# mkdir -p /data/etcd # systemd 服务配置文件 [root@linux9 ~]# cat /usr/lib/systemd/system/etcd.service [Unit] Description=Etcd Server After=network.target After=network-online.target Wants=network-online.target [Service] Type=notify EnvironmentFile=/etc/etcd/etcd.conf ExecStart=/usr/local/etcd-v3.4.23-linux-amd64/etcd --config-file=/etc/etcd/etcd.conf Restart=on-failure LimitNOFILE=65536 [Install] WantedBy=multi-user.target # 创建etcd配置文件 [root@linux9 ~]# cat /etc/etcd/etcd.conf # 节点名称 name: 'etcd-1' # 指定节点的数据存储目录 data-dir: '/data/etcd' # 对外提供服务的地址,客户端会连接到这里和 etcd 交互 listen-client-urls: 'http://192.168.10.128:2379,http://127.0.0.1:2379' # 启动etcd服务并添加开机自启动 [root@linux9 ~]# systemctl daemon-reload [root@linux9 ~]# systemctl start etcd [root@linux9 ~]# systemctl enable etcd
参数 说明
–name etcd节点名字如果在集群环境中,name必须是唯一的,建议用主机名称或者机器ID。
–data-dir 数据存储目录
–initial-cluster etcd启动的时候,通过这个配置找到其他ectd节点的地址列表,格式:‘节点名字1=http://节点ip1:2380,节点名字1=http://节点ip1:2380,…’
–initial-cluster-state 初始化的时候,集群的状态 “new” 或者 “existing”两种状态,new代表新建的集群,existing表示加入已经存在的集群。
–advertise-client-urls 如果–listen-client-urls配置了,多个监听客户端请求的地址,这个参数可以给出,建议客户端使用什么地址访问etcd。
–initial-advertise-peer-urls 服务端之间通讯使用的地址列表。
–listen-client-urls 监听客户端请求的地址列表,格式:‘http://localhost:2379’ , 多个用逗号分隔。
–listen-peer-urls 服务端节点之间通讯的监听地址,格式:‘http://localhost:2380’
1
2
3
4
5
6
7
8
9
10
11
12
13
14
# 查看集群状态 [root@linux9 ~]# etcdctl endpoint status --cluster -w table +----------------------------+------------------+---------+---------+-----------+------------+-----------+------------+--------------------+--------+ | ENDPOINT | ID | VERSION | DB SIZE | IS LEADER | IS LEARNER | RAFT TERM | RAFT INDEX | RAFT APPLIED INDEX | ERRORS | +----------------------------+------------------+---------+---------+-----------+------------+-----------+------------+--------------------+--------+ | http://192.168.10.128:2379 | 9a20d64f814efc90 | 3.4.23 | 20 kB | true | false | 2 | 4 | 4 | | +----------------------------+------------------+---------+---------+-----------+------------+-----------+------------+--------------------+--------+ # 设置key value [root@linux9 ~]# etcdctl put greeting "Hello, etcd" OK # 获取value [root@linux9 ~]# etcdctl get greeting greeting Hello, etcd
docker容器部署 官方文档参考地址: [https://etcd.io/docs/v3.5/op-guide/container/ ](https://etcd.io/docs/v3.5/op-guide/container/),官方docker示例使用命令行参数启动,并不推荐。
1
2
3
4
5
6
7
8
9
10
11
12
13
14
15
16
17
18
19
20
21
22
23
24
25
26
27
28
29
30
31
32
33
34
35
36
37
38
39
# 创建数据目录与配置文件目录 [root@linux9 ~]# mkdir -p /etc/etcd [root@linux9 ~]# mkdir -p /data/etcd # 修改数据目录权限,否则无法写入数据 [root@linux9 ~]# chown -R 1001:1001 /data/etcd/ # 创建etcd配置文件 [root@linux9 ~]# cat /etc/etcd/etcd.conf # 节点名称 name: 'etcd-1' # 指定节点的数据存储目录 data-dir: '/data' # 对外提供服务的地址,客户端会连接到这里和 etcd 交互 listen-client-urls: 'http://0.0.0.0:2379' # 启动etcd容器 [root@linux9 ~]# docker run -d --name etcd -p 2379:2379 -v /data/etcd:/data -v /etc/etcd:/conf bitnami/etcd:latest etcd --config-file /conf/etcd.conf # 访问验证 [root@linux9 etcd]# docker exec etcd sh -c "etcd --version" etcd Version: 3.5.6 Git SHA: cecbe35ce Go Version: go1.16.15 Go OS/Arch: linux/amd64 [root@linux9 etcd]# docker exec etcd sh -c "etcdctl version" etcdctl version: 3.5.6 API version: 3.5 [root@linux9 etcd]# docker exec etcd sh -c "etcdctl endpoint status --cluster -w table" +------------------------+------------------+---------+---------+-----------+------------+-----------+------------+--------------------+--------+ | ENDPOINT | ID | VERSION | DB SIZE | IS LEADER | IS LEARNER | RAFT TERM | RAFT INDEX | RAFT APPLIED INDEX | ERRORS | +------------------------+------------------+---------+---------+-----------+------------+-----------+------------+--------------------+--------+ | http://172.17.0.2:2379 | 8e9e05c52164694d | 3.5.6 | 20 kB | true | false | 6 | 13 | 13 | | +------------------------+------------------+---------+---------+-----------+------------+-----------+------------+--------------------+--------+ [root@linux9 etcd]# docker exec etcd sh -c "etcdctl put foo bar" OK [root@linux9 etcd]# docker exec etcd sh -c "etcdctl get foo" foo bar
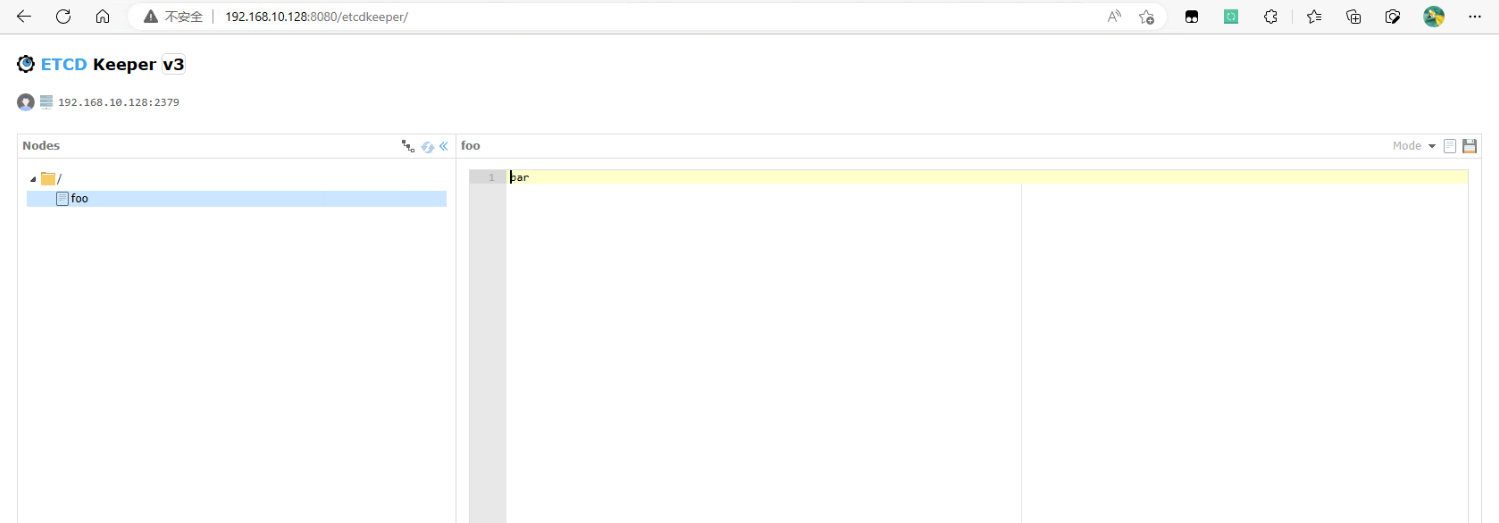
web管理工具etcdkeeper部署 1 [root@linux9 ~]# docker run -d -p 8080:8080 --name=etcdkeeper evildecay/etcdkeeper:latest
1
二进制文件部署etcd集群 在生产环境或对高可用有要求的环境下,需要使用 etcd 的高可用部署方式进行部署,etcd 的 raft 协议保障各个节点数据的一致性。至少使用三台以上奇数节点,才能达到最好的集群容错。
角色规划 主机名称 ** | **系统 ** | **IP地址 ** | **部署组件 ** |
| --- | --- | --- | --- |
| tiaoban | CentOS 8.5 | 192.168.10.100 | etcd1 |
| k8s-work1 | CentOS 8.5 | 192.168.10.11 | etcd2 |
| k8s-work2 | CentOS 8.5 | 192.168.10.12 | etcd3 |
我们以3个节点的高可用静态方式部署 etcd,3个节点的IP地址分别是192.168.10.100、192.168.10.11和192.168.10.12。每个节点etcd配置文件主要的差异就是当前节点的 IP 地址和命名。部署启动方法与单节点部署启动方式完全一致,只需要更改配置文件内容即可。
注意事项 –listen-client-urls用于监听客户端消息,必须设置为真实ip地址,如果机器为云主机,可以设置为云主机的私有ip地址或0.0.0.0(代表监听所有地址),不能设置为公网ip地址
–listen-peer-urls用于监听其他member发送过来的消息,跟listen-client-urls一样,必须设置为真实ip地址,如果机器为云主机,不能设置为公网ip
–initial-advertise-peer-urls用于监听其他member同步信号,该地址其他member必须能直接访问,所以如果是云主机该地址必须设置为云主机的公网ip地址
–initial-cluster群集列表,该列表中的值必须跟各个member的initial-advertise-peer-urls值一样
tiaoban节点配置 1 2 3 4 5 6 7 8 9 10 11 12 13 14 15 16 17 18 # 节点名称 name: "etcd1" # 数据存储目录 data-dir: "/data/etcd" # 对外公告的该节点客户端监听地址,这个值会告诉集群中其他节点 advertise-client-urls: "http://192.168.10.100:2379" # 监听客户端请求的地址列表 listen-client-urls: "http://192.168.10.100:2379,http://127.0.0.1:2379" # 监听URL,用于节点之间通信监听地址 listen-peer-urls: "http://192.168.10.100:2380" # 服务端之间通讯使用的地址列表,该节点同伴监听地址,这个值会告诉集群中其他节点 initial-advertise-peer-urls: "http://192.168.10.100:2380" # etcd启动时,etcd集群的节点地址列表 initial-cluster: "etcd1=http://192.168.10.100:2380,etcd2=http://192.168.10.11:2380,etcd3=http://192.168.10.12:2380" # etcd集群的初始集群令牌 initial-cluster-token: 'etcd-cluster' # etcd集群初始化的状态,new代表新建集群,existing表示加入现有集群 initial-cluster-state: 'new'
k8s-work1节点配置 1 2 3 4 5 6 7 8 9 10 11 12 13 14 15 16 17 18 # 节点名称 name: "etcd2" # 数据存储目录 data-dir: "/data/etcd" # 对外公告的该节点客户端监听地址,这个值会告诉集群中其他节点 advertise-client-urls: "http://192.168.10.11:2379" # 监听客户端请求的地址列表 listen-client-urls: "http://192.168.10.11:2379,http://127.0.0.1:2379" # 监听URL,用于节点之间通信监听地址 listen-peer-urls: "http://192.168.10.11:2380" # 服务端之间通讯使用的地址列表,该节点同伴监听地址,这个值会告诉集群中其他节点 initial-advertise-peer-urls: "http://192.168.10.11:2380" # etcd启动时,etcd集群的节点地址列表 initial-cluster: "etcd1=http://192.168.10.100:2380,etcd2=http://192.168.10.11:2380,etcd3=http://192.168.10.12:2380" # etcd集群的初始集群令牌 initial-cluster-token: 'etcd-cluster' # etcd集群初始化的状态,new代表新建集群,existing表示加入现有集群 initial-cluster-state: 'new'
k8s-work2节点配置 1 2 3 4 5 6 7 8 9 10 11 12 13 14 15 16 17 18 # 节点名称 name: "etcd3" # 数据存储目录 data-dir: "/data/etcd" # 对外公告的该节点客户端监听地址,这个值会告诉集群中其他节点 advertise-client-urls: "http://192.168.10.12:2379" # 监听客户端请求的地址列表 listen-client-urls: "http://192.168.10.12:2379,http://127.0.0.1:2379" # 监听URL,用于节点之间通信监听地址 listen-peer-urls: "http://192.168.10.12:2380" # 服务端之间通讯使用的地址列表,该节点同伴监听地址,这个值会告诉集群中其他节点 initial-advertise-peer-urls: "http://192.168.10.12:2380" # etcd启动时,etcd集群的节点地址列表 initial-cluster: "etcd1=http://192.168.10.100:2380,etcd2=http://192.168.10.11:2380,etcd3=http://192.168.10.12:2380" # etcd集群的初始集群令牌 initial-cluster-token: 'etcd-cluster' # etcd集群初始化的状态,new代表新建集群,existing表示加入现有集群 initial-cluster-state: 'new'
访问验证 1 2 3 4 5 6 7 8 9 10 11 12 13 [root@k8s-master etcd]# etcdctl endpoint status --cluster -w table +---------------------------+------------------+---------+---------+-----------+------------+-----------+------------+--------------------+--------+ | ENDPOINT | ID | VERSION | DB SIZE | IS LEADER | IS LEARNER | RAFT TERM | RAFT INDEX | RAFT APPLIED INDEX | ERRORS | +---------------------------+------------------+---------+---------+-----------+------------+-----------+------------+--------------------+--------+ | http://192.168.10.12:2379 | 5d2c1bd3b22f796f | 3.4.23 | 20 kB | true | false | 3 | 9 | 9 | | | http://192.168.10.10:2379 | 8c632555af4d958d | 3.4.23 | 16 kB | false | false | 3 | 9 | 9 | | | http://192.168.10.11:2379 | bc34c6bd673bdf9f | 3.4.23 | 20 kB | false | false | 3 | 9 | 9 | | +---------------------------+------------------+---------+---------+-----------+------------+-----------+------------+--------------------+--------+ [root@k8s-master etcd]# etcdctl put foo bar OK [root@k8s-master etcd]# etcdctl get foo foo bar
部署TLS加密集群 etcd 支持通过 TLS 协议的加密通讯,在实际企业生产环境中,出于安全规范要求,建议开启TLS加密。TLS 通道可以用于加密内部的集群通讯,也可以用于加密客户端请求。 etcd 的 TLS 有两对,一对是 etcd 和 client 端的 TLS 配置。一对是 etcd 之间的 peer 的 TLS 配置。有很多方式可以创建CA证书和私钥,其中比较流行的有两种
官方文档推荐使用cfssl生成证书
下载安装cfssl 下载地址: [https://github.com/cloudflare/cfssl/releases ](https://github.com/cloudflare/cfssl/releases)
1 2 3 4 5 6 7 8 [root@tiaoban ~]# wget https://github.com/cloudflare/cfssl/releases/download/v1.6.3/cfssl_1.6.3_linux_amd64 [root@tiaoban ~]# wget https://github.com/cloudflare/cfssl/releases/download/v1.6.3/cfssljson_1.6.3_linux_amd64 [root@tiaoban ~]# mv cfssl_1.6.3_linux_amd64 /usr/bin/cfssl [root@tiaoban ~]# mv cfssljson_1.6.3_linux_amd64 /usr/bin/cfssljson [root@tiaoban ~]# chmod +x /usr/bin/{cfssl,cfssljson} [root@tiaoban ~]# cfssl version Version: 1.6.3 Runtime: go1.18
创建默认配置文件 1 2 [root@tiaoban ~]# cfssl print-defaults config > ca-config.json [root@tiaoban ~]# cfssl print-defaults csr > ca-csr.json
证书类型 客户端证书用于服务器验证客户端身份
+ 服务器端证书用于客户端验证服务器端身份
+ 对等证书由etcd集群成员使用,同时使用客户端认证和服务器端认证
创建 CA 证书 由于各个组件都需要配置证书,并且依赖 CA 证书来签发证书,所以我们首先要生成好 CA 证书以及后续的签发配置文件
1 2 3 4 5 6 7 8 9 10 11 12 13 14 15 16 17 18 19 20 21 22 23 24 25 26 27 28 29 30 31 32 33 34 35 36 37 38 39 40 41 42 43 44 45 46 47 48 49 50 51 52 53 54 55 56 57 58 59 60 # 修改ca-config配置 [root@tiaoban etcd]# cat > ca-config.json <<EOF { "signing": { "default": { "expiry": "43800h" }, "profiles": { "server": { "expiry": "43800h", "usages": [ "signing", "key encipherment", "server auth" ] }, "client": { "expiry": "43800h", "usages": [ "signing", "key encipherment", "client auth" ] }, "peer": { "expiry": "43800h", "usages": [ "signing", "key encipherment", "server auth", "client auth" ] } } } } EOF # 配置证书请求 [root@tiaoban etcd]# cat > ca-csr.json <<EOF { "CN": "Etcd", "key": { "algo": "rsa", "size": 2048 }, "names": [ { "C": "CN", "ST": "BeiJing", "L": "BeiJing", "O": "Etcd", "OU": "CA" } ] } EOF # 生成CA证书 [root@tiaoban etcd]# cfssl gencert -initca ca-csr.json | cfssljson -bare ca - [root@tiaoban etcd]# ls ca-config.json ca.csr ca-csr.json ca-key.pem ca.pem
生成的文件中有下面三个后面会用到:
ca-key.pem: CA 证书密钥 ca.pem: CA 证书 ca-config.json: 证书签发配置,用 CA 证书来签发其它证书时需要用
csr 文件字段解释:
CN: Common Name,apiserver 从证书中提取该字段作为请求的用户名 (User Name) Organization,apiserver 从证书中提取该字段作为请求用户所属的组 (Group)
由于这里是 CA 证书,是签发其它证书的根证书,这个证书密钥不会分发出去作为 client 证书,所有组件使用的 client 证书都是由 CA 证书签发而来,所以 CA 证书的 CN 和 O 的名称并不重要,后续其它签发出来的证书的 CN 和 O 的名称才是有用的
生成服务器端证书 注意hosts字段需要加上etcd全部节点的IP/主机名信息及127.0.0.1
1 2 3 4 5 6 7 8 9 10 11 12 13 14 15 16 17 18 19 20 21 22 23 24 25 26 27 28 # 配置证书请求 [root@tiaoban etcd]# cat > server-csr.json <<EOF { "CN": "server", "hosts": [ "127.0.0.1", "192.168.10.100", "192.168.10.11", "192.168.10.12" ], "key": { "algo": "ecdsa", "size": 256 }, "names": [ { "C": "CN", "L": "BeiJing", "ST": "BeiJing" } ] } EOF # 创建服务器端证书和私钥 [root@tiaoban etcd]# cfssl gencert -ca=ca.pem -ca-key=ca-key.pem -config=ca-config.json -profile=server server-csr.json | cfssljson -bare server # 生成以下文件 [root@tiaoban etcd]# ls server* server.csr server-csr.json server-key.pem server.pem
生成客户端证书 1 2 3 4 5 6 7 8 9 10 11 12 13 14 15 16 17 18 19 20 21 22 23 24 25 # 配置证书请求 [root@tiaoban etcd]# cat > client-csr.json <<EOF { "CN": "client", "hosts": [ "" ], "key": { "algo": "ecdsa", "size": 256 }, "names": [ { "C": "CN", "L": "BeiJing", "ST": "BeiJing" } ] } EOF # 创建客户端证书和私钥 [root@tiaoban etcd]# cfssl gencert -ca=ca.pem -ca-key=ca-key.pem -config=ca-config.json -profile=client client-csr.json | cfssljson -bare client # 生成以下文件 [root@tiaoban etcd]# ls client* client.csr client-csr.json client-key.pem client.pem
生成对等证书 peer证书可以统一,也可以分别生成,如果需要统一,则需要在hosts字段加上所有节点的IP/主机名信息,如果分开生成,则hosts字段只需要填写对应节点的IP/主机名信息即可
1 2 3 4 5 6 7 8 9 10 11 12 13 14 15 16 17 18 19 20 21 22 23 24 25 26 27 # 配置证书请求 [root@tiaoban etcd]# cat > peer-csr.json <<EOF { "CN": "peer", "hosts": [ "192.168.10.100", "192.168.10.11", "192.168.10.12" ], "key": { "algo": "ecdsa", "size": 256 }, "names": [ { "C": "CN", "L": "BeiJing", "ST": "BeiJing" } ] } EOF # 创建对等证书和私钥 [root@tiaoban etcd]# cfssl gencert -ca=ca.pem -ca-key=ca-key.pem -config=ca-config.json -profile=peer peer-csr.json | cfssljson -bare peer # 生成以下文件 [root@tiaoban etcd]# ls peer* peer.csr peer-csr.json peer-key.pem peer.pem
拷贝密钥到所有节点并更新系统证书库 1 2 3 4 5 6 [root@tiaoban etcd]# mkdir -p /etc/etcd/pki [root@tiaoban etcd]# cp ca.pem server.pem server-key.pem peer.pem peer-key.pem /etc/etcd/pki/ [root@tiaoban etcd]# scp ca.pem server.pem server-key.pem peer.pem peer-key.pem k8s-work1:/etc/etcd/pki/ [root@tiaoban etcd]# scp ca.pem server.pem server-key.pem peer.pem peer-key.pem k8s-work2:/etc/etcd/pki/ [root@tiaoban etcd]# yum install ca-certificates -y [root@tiaoban etcd]# update-ca-trust
修改etcd配置并重启etcd 主要是将原本的http链接全部改为https,并指定证书密钥地址
1 2 3 4 5 6 7 8 9 10 11 12 13 14 15 16 17 18 19 20 21 22 23 24 25 26 27 28 29 30 31 32 33 34 35 [root@tiaoban etcd]# cat /etc/etcd/etcd.conf # 节点名称 name: "etcd1" # 数据存储目录 data-dir: "/data/etcd" # 对外公告的该节点客户端监听地址,这个值会告诉集群中其他节点 advertise-client-urls: "https://192.168.10.100:2379" # 监听客户端请求的地址列表 listen-client-urls: "https://192.168.10.100:2379,https://127.0.0.1:2379" # 监听URL,用于节点之间通信监听地址 listen-peer-urls: "https://192.168.10.100:2380" # 服务端之间通讯使用的地址列表,该节点同伴监听地址,这个值会告诉集群中其他节点 initial-advertise-peer-urls: "https://192.168.10.100:2380" # etcd启动时,etcd集群的节点地址列表 initial-cluster: "etcd1=https://192.168.10.100:2380,etcd2=https://192.168.10.11:2380,etcd3=https://192.168.10.12:2380" # etcd集群的初始集群令牌 initial-cluster-token: 'etcd-cluster' # etcd集群初始化的状态,new代表新建集群,existing表示加入现有集群 initial-cluster-state: 'new' # 日志配置 logger: zap # 客户端加密 client-transport-security: cert-file: "/etc/etcd/pki/server.pem" key-file: "/etc/etcd/pki/server-key.pem" client-cert-auth: True trusted-ca-file: "/etc/etcd/pki/ca.pem" # 节点加密 peer-transport-security: cert-file: "/etc/etcd/pki/peer.pem" key-file: "/etc/etcd/pki/peer-key.pem" client-cert-auth: True trusted-ca-file: "/etc/etcd/pki/ca.pem"
访问验证 1 2 3 4 5 6 7 8 9 10 11 12 13 [root@tiaoban etcd]# etcdctl --endpoints=https://192.168.10.100:2379 --cacert=ca.pem --cert=client.pem --key=client-key.pem endpoint status --cluster -w table +-----------------------------+------------------+---------+---------+-----------+------------+-----------+------------+--------------------+--------+ | ENDPOINT | ID | VERSION | DB SIZE | IS LEADER | IS LEARNER | RAFT TERM | RAFT INDEX | RAFT APPLIED INDEX | ERRORS | +-----------------------------+------------------+---------+---------+-----------+------------+-----------+------------+--------------------+--------+ | https://192.168.10.11:2379 | 6571fb7574e87dba | 3.4.23 | 20 kB | false | false | 310 | 46 | 46 | | | https://192.168.10.12:2379 | 9b449b0ff1d4c375 | 3.4.23 | 20 kB | false | false | 310 | 46 | 46 | | | https://192.168.10.100:2379 | f330bec74ce6cc42 | 3.4.23 | 20 kB | true | false | 310 | 46 | 46 | | +-----------------------------+------------------+---------+---------+-----------+------------+-----------+------------+--------------------+--------+ [root@tiaoban etcd]# etcdctl --endpoints=https://192.168.10.100:2379 --cacert=ca.pem --cert=client.pem --key=client-key.pem put /foo/bar "hello world" OK [root@tiaoban etcd]# etcdctl --endpoints=https://192.168.10.100:2379 --cacert=ca.pem --cert=client.pem --key=client-key.pem get /foo/bar /foo/bar hello world
helm部署etcd集群 使用helm可以快速部署一个etcd集群,集成了配置基于角色的访问控制和 TLS 加密,并且可以按需开启定时备份和监控指标采集。
添加仓库,获取安装包 1 2 3 4 5 6 7 8 9 10 11 12 [root@k8s-master k8s-test]# cd etcd/ [root@k8s-master etcd]# helm repo add my-repo https://charts.bitnami.com/bitnami "my-repo" has been added to your repositories [root@k8s-master etcd]# helm pull my-repo/etcd [root@k8s-master etcd]# ls etcd-8.8.0.tgz [root@k8s-master etcd]# tar -zxf etcd-8.8.0.tgz [root@k8s-master etcd]# ls etcd etcd-8.8.0.tgz [root@k8s-master etcd]# cd etcd/ [root@k8s-master etcd]# ls Chart.lock charts Chart.yaml README.md templates values.yaml
修改配置 1 2 3 4 5 6 7 8 9 10 11 12 13 14 15 16 17 18 19 20 21 22 23 24 25 26 27 28 29 30 31 32 33 34 35 [root@k8s-master etcd]# vim values.yaml # 自定义root密码 96 auth: 97 ## Role-based access control parameters 98 ## ref: https://etcd.io/docs/current/op-guide/authentication/ 99 ## 100 rbac: 101 ## @param auth.rbac.create Switch to enable RBAC authentication 102 ## 103 create: true 104 ## @param auth.rbac.allowNoneAuthentication Allow to use etcd without configuring RBAC authentication 105 ## 106 allowNoneAuthentication: true 107 ## @param auth.rbac.rootPassword Root user password. The root user is always `root` 108 ## 109 rootPassword: "123456" # 指定root密码 # 自定义存储方式 575 persistence: 576 ## @param persistence.enabled If true, use a Persistent Volume Claim. If false, use emptyDir. 577 ## 578 enabled: true # 如果没有sc,此处改为false 579 ## @param persistence.storageClass Persistent Volume Storage Class 580 ## If defined, storageClassName: <storageClass> 581 ## If set to "-", storageClassName: "", which disables dynamic provisioning 582 ## If undefined (the default) or set to null, no storageClassName spec is 583 ## set, choosing the default provisioner. (gp2 on AWS, standard on 584 ## GKE, AWS & OpenStack) 585 ## 586 storageClass: "nfs-client" # 填写sc名称 # 修改副本数,建议奇数3个起步 257 ## @param replicaCount Number of etcd replicas to deploy 258 ## 259 replicaCount: 3
安装etcd服务 1 2 3 4 5 6 7 8 9 10 11 12 13 14 15 16 17 18 19 20 21 22 23 24 25 26 27 28 29 30 31 32 33 34 35 36 37 38 [root@k8s-master etcd]# kubectl create ns etcd namespace/etcd created [root@k8s-master etcd]# helm install etcd -n etcd ../etcd NAME: etcd LAST DEPLOYED: Fri Mar 17 20:43:31 2023 NAMESPACE: etcd STATUS: deployed REVISION: 1 TEST SUITE: None NOTES: CHART NAME: etcd CHART VERSION: 8.8.0 APP VERSION: 3.5.7 ** Please be patient while the chart is being deployed ** etcd can be accessed via port 2379 on the following DNS name from within your cluster: etcd.etcd.svc.cluster.local To create a pod that you can use as a etcd client run the following command: kubectl run etcd-client --restart='Never' --image docker.io/bitnami/etcd:3.5.7-debian-11-r14 --env ROOT_PASSWORD=$(kubectl get secret --namespace etcd etcd -o jsonpath="{.data.etcd-root-password}" | base64 -d) --env ETCDCTL_ENDPOINTS="etcd.etcd.svc.cluster.local:2379" --namespace etcd --command -- sleep infinity Then, you can set/get a key using the commands below: kubectl exec --namespace etcd -it etcd-client -- bash etcdctl --user root:$ROOT_PASSWORD put /message Hello etcdctl --user root:$ROOT_PASSWORD get /message To connect to your etcd server from outside the cluster execute the following commands: kubectl port-forward --namespace etcd svc/etcd 2379:2379 & echo "etcd URL: http://127.0.0.1:2379" * As rbac is enabled you should add the flag `--user root:$ETCD_ROOT_PASSWORD` to the etcdctl commands. Use the command below to export the password: export ETCD_ROOT_PASSWORD=$(kubectl get secret --namespace etcd etcd -o jsonpath="{.data.etcd-root-password}" | base64 -d)
查看资源信息 1 2 3 4 5 6 7 8 9 [root@k8s-master etcd]# kubectl get pod -n etcd -o wide NAME READY STATUS RESTARTS AGE IP NODE NOMINATED NODE READINESS GATES etcd-0 1/1 Running 0 1m13s 10.244.1.154 k8s-work1 <none> <none> etcd-1 1/1 Running 0 1m13s 10.244.2.50 k8s-work2 <none> <none> etcd-2 1/1 Running 0 1m13s 10.244.1.155 k8s-work1 <none> <none> [root@k8s-master etcd]# kubectl get svc -n etcd NAME TYPE CLUSTER-IP EXTERNAL-IP PORT(S) AGE etcd ClusterIP 10.102.32.213 <none> 2379/TCP,2380/TCP 9m48s etcd-headless ClusterIP None <none> 2379/TCP,2380/TCP 9m48s
访问测试